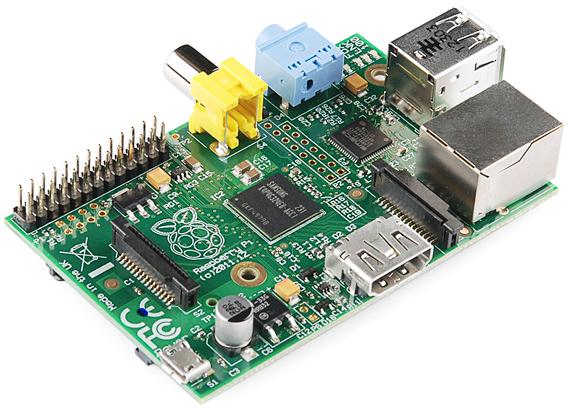
The Raspberry Pi is a cross between a typical embedded system – like an Arduino – and a desktop computer. The Pi packs a 700MHz ARM11 Core with 512MB of RAM, HDMI and audio outputs, 2 USB ports, an Ethernet jack, and anSD socket with support for up to a 32GB SD card. In the eyes of some, it’s one of the more powerful, cost-effective embedded boards to hit the market. To others, it’s one of the most compact, bare-bones personal computers ever to grace the electronics world with it’s presence. In either case, it’s here to blur the line between the world of embedded electronics and personal computing.
The Raspberry Pi is a great platform on which to learn Linux and programming. It’s also a powerful solution for many “Internet-of-Things” projects out there, because it’s so easy to get connected to the Internet. It can run Python scripts, or even compile programs written in C. It’s a full-blown computer!
And, of course, it can be used to play games.
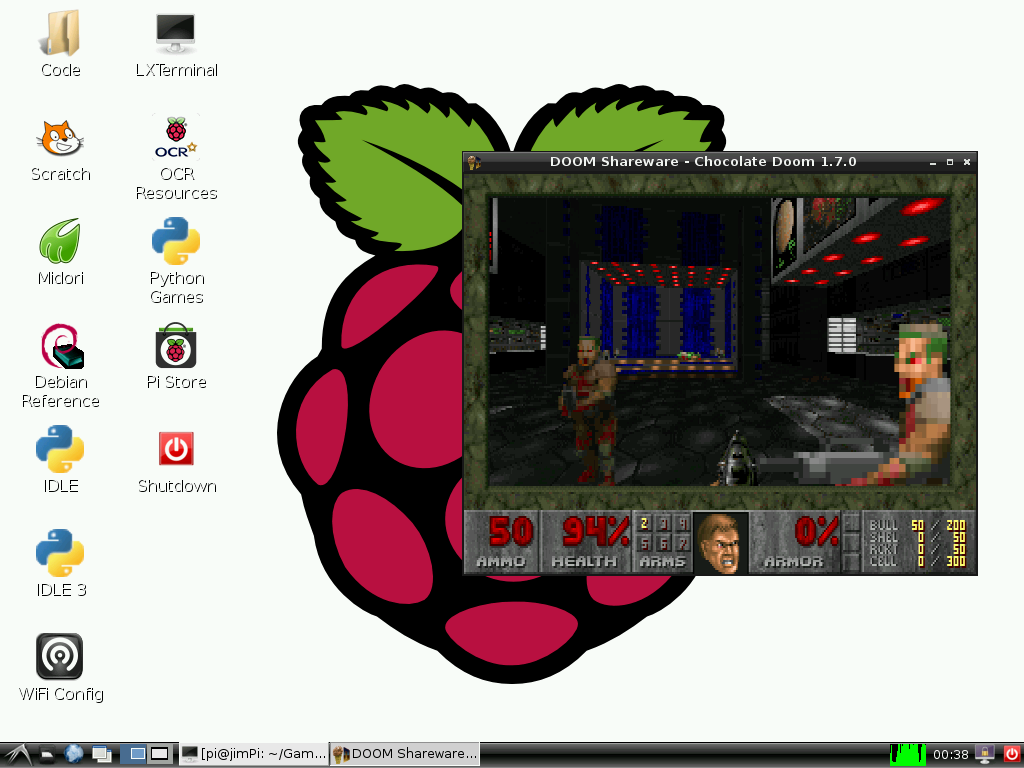
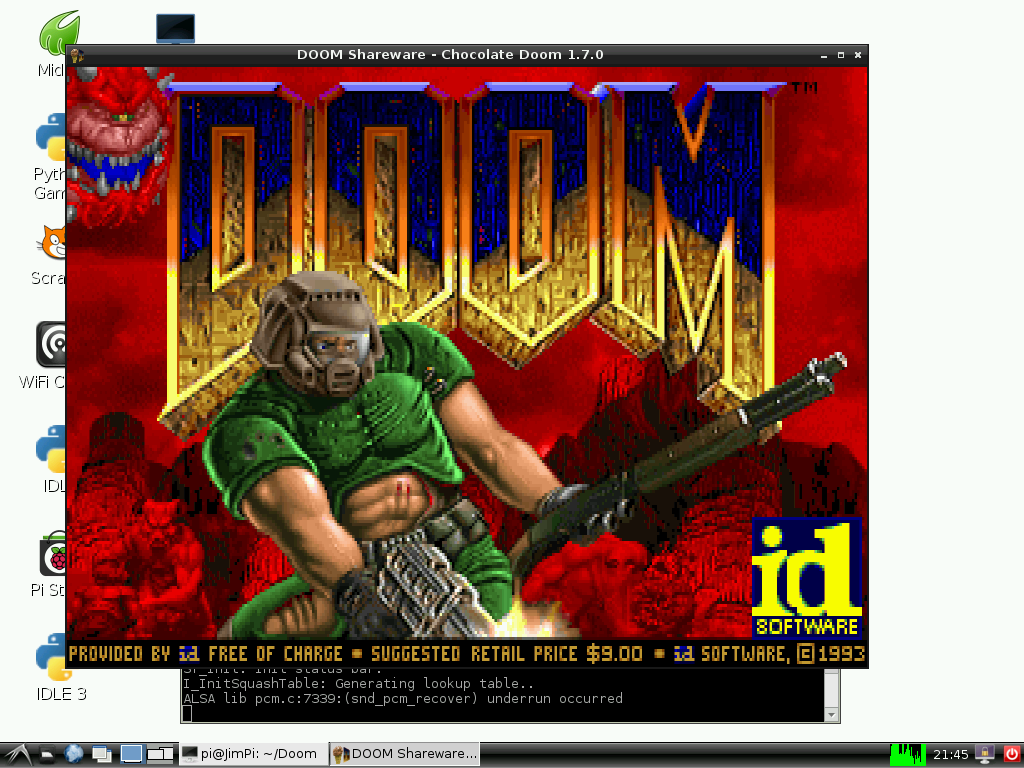
Chocolate Doom running on the Pi.
Covered in This Tutorial
In this tutorial, we’ll show you how to quickly get up-and-running with the Raspberry Pi. We’ll set the Pi up with the most popular, community-driven Linux distribution available: Raspbian. Next, we’ll show you how to set up Raspbian, and access some of the features included with it.
Finally, and most importantly, we’ll show you how to set up and run Chocolate Doom, a Doom source port that runs beautifully on the little Pi. Mmmm chocolate pie.
Required Materials
To follow along with this tutorial, you’ll need the following materials:

- Raspberry Pi Model B or Model A (has less RAM and no Ethernet)
- A 5V power supply with a micro USB termination. The supply should be able to source at least 700mA. Most phone chargers (with micro USB cables) should work.
- An SD Card no smaller than 4GB, and no less than class 4.
- A USB keyboard and mouse.
- A display connected to either the HDMI or RCA composite video output.
- If your monitor only has a VGA port, there are HDMI to VGA adapters to convert between the two. (You may need a beefier power supply if you’re using that.)
- If your monitor only has DVI, converting from HDMI is easy with an HDMI to DVI cable.
- An ethernet cable and a connection to an Internet-connected network. (Optional, but very useful to get software updates [and Doom].)
- Alternatively, you can use a USB WiFi module with the Pi. Check out our Wireless on the Pi tutorial for help setting that up.
- Headphones or speakers with a 3.5mm stereo jack termination (optional, unless, for some reason, you don’t want to hear the dying wails of former humans).
Suggested Reading
This tutorial aims to be as Raspberry Pi beginnger-friendly as possible. No previous knowledge of electronics is required. Feel free to jump right in on the next page. If you want to learn a little bit about what’s going on behind the scenes, here are some beginner tutorials we recommend reading:
- What is Electricity?
- Voltage, Current, Resistance, and Ohm’s Law
- Analog vs. Digital
- Series and Parallel Circuits
Prepare an SD Card
Before you can start installing Raspbian, you’ll have to get the installer set up on an SD card. Follow the steps below to prepare your SD card by formatting it, and then installing the NOOBS software.
Regardless of which operating system you’re using, begin by inserting your SD card into your computer. Then, you’ll need to begin by formatting the card. Follow along with the section below that matches your OS.
Format the Card
Windows
- Download SDFormatter for Windows. Unzip it, and run Setup.exe. Follow along with the InstallShield Wizard to install SDFormatter.
- Open SDFormatter.
- Click Option and set FORMAT SIZE ADJUSTMENT to ON.

- Select your card from the Drive dropdown menu (if it wasn’t selected automatically). Check and double-check that the drive letter is correct.
- Click Format, then click OK a couple times. You should get a Drive Format complete! pop up shortly.
Mac OS X
- Download SDFormatter for Mac. Open the the downloaded file, and follow the Installer directions to install.
- Open SDFormatter (it should be in your Applications folder).
- Select Overwrite Format as the format option.
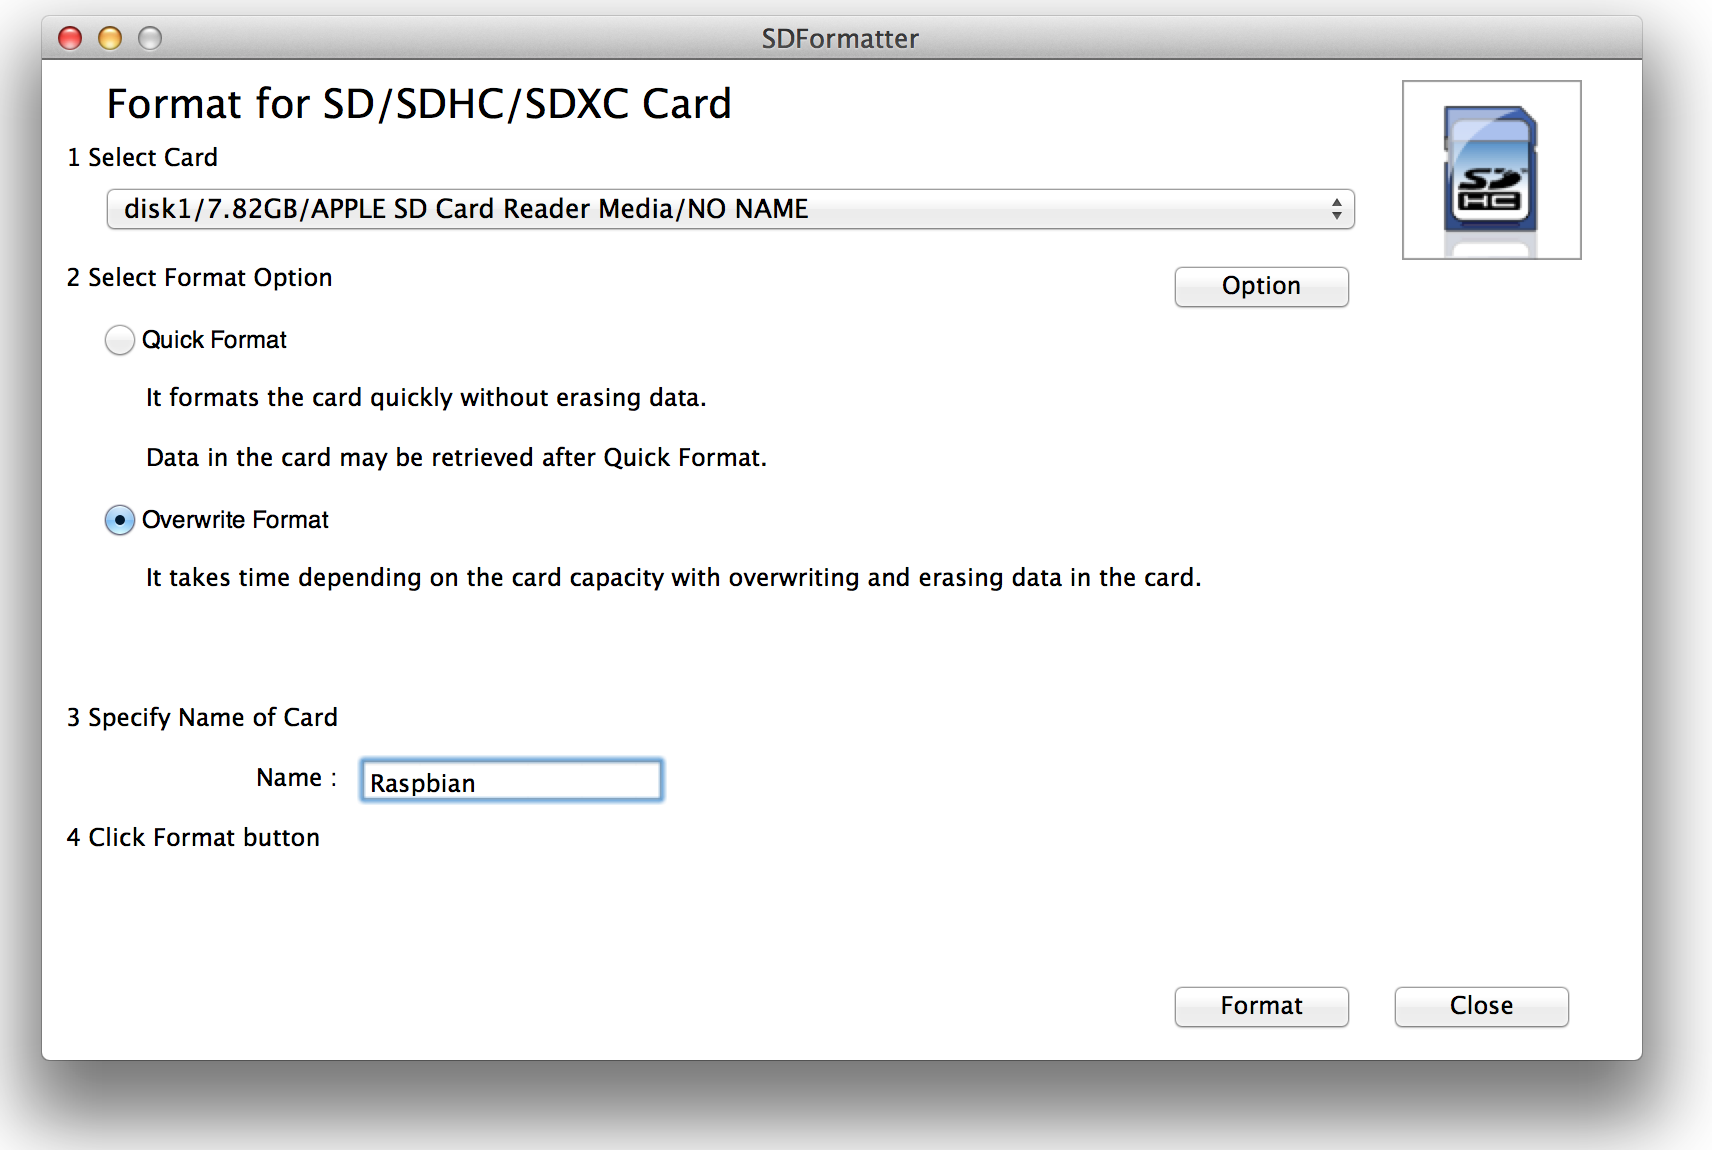
- Select your card from the top dropdown menu (if it wasn’t selected automatically). Make sure it’s correct!
- Click Format, and watch the progress bar slowly crawl across the bottom of the window. A Card Format complete ! message should appear once successful.

Download NOOBS
Raspberry Pi’s New Out of Box Software (NOOBS) is recommended for first time Pi users (and even advanced ones). It includes a variety of useful operating system images (including Raspbian), and really simplifies the process of installing them.
Head over to the Raspbery Pi downloads page, and download the most recent NOOBS (offline install) image(NOOBS_v1_3_2.zip as of writing this). It should be a 1-ish GB ZIP folder.
Once the download has finished, extract the ZIP folder and place the contents at the top level of your SD card. Once unzipped, the directory structure should look a little something like this:
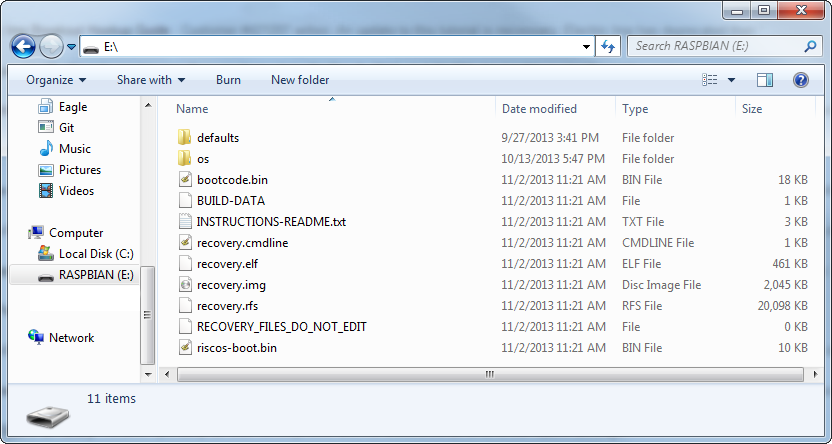
Dang! That is one prepared SD card. Time to set up the Pi.
Prepare the Pi
This page is all about connecting peripherals to your Pi in preparation for installing Raspbian. So preheat your oven and let’s get cooking.
Connect Display
There are two potential places to connect a display on the Pi: either HDMI or component video.
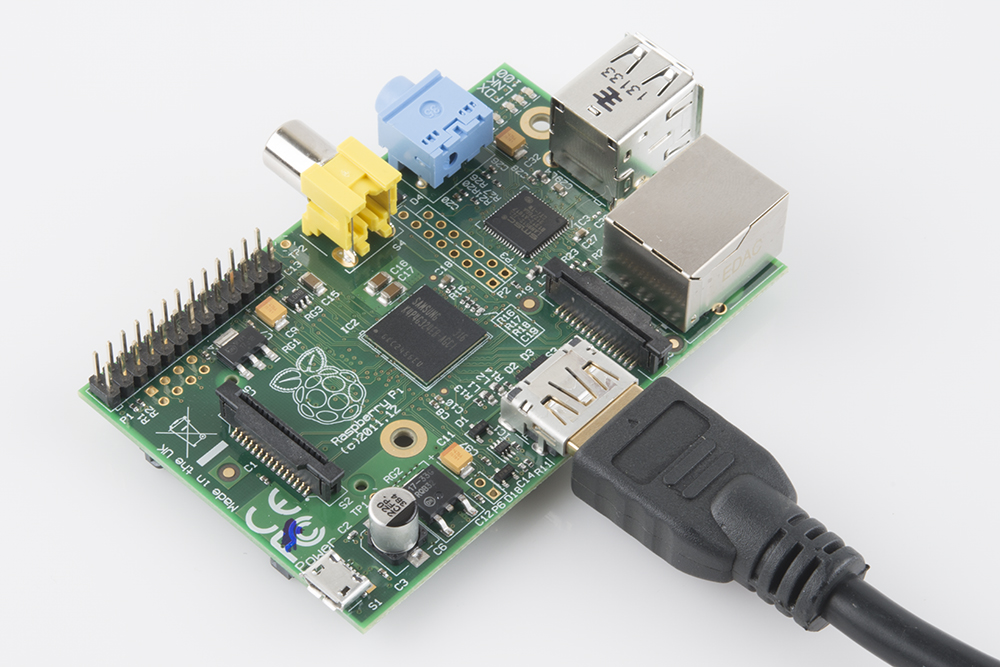
If your monitor has neither of those inputs, a VGA-to-HDMI adapter or HDMI to DVI cable might be what you need.
HDMI does carry audio, if your display can support that. Otherwise you can use the 3.5mm jack on the other side.
Connect USB Peripherals
Next up, connect your mouse and keyboard. As long as you don’t plan to use any other USB peripherals (flash drives, WiFi cards, etc.) you can use both USB ports on the Pi. Otherwise, you may want to look into adding a USB hub.
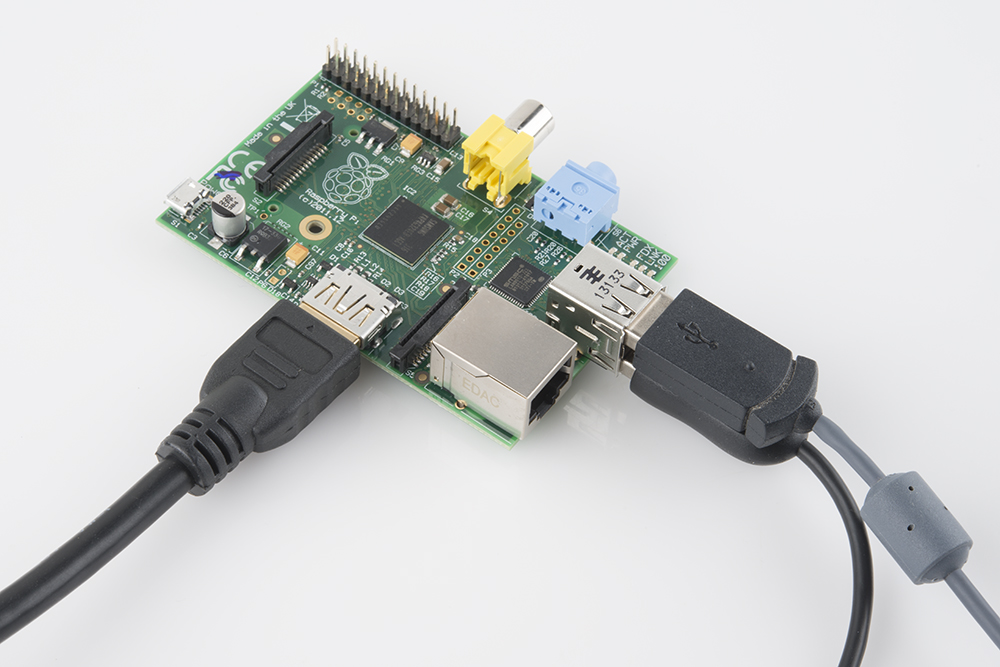
Some of these peripherals can use a lot of power (especially optical and wireless mice). If you notice issues with the mouse or keyboard, you may need to use them with a powered USB hub.
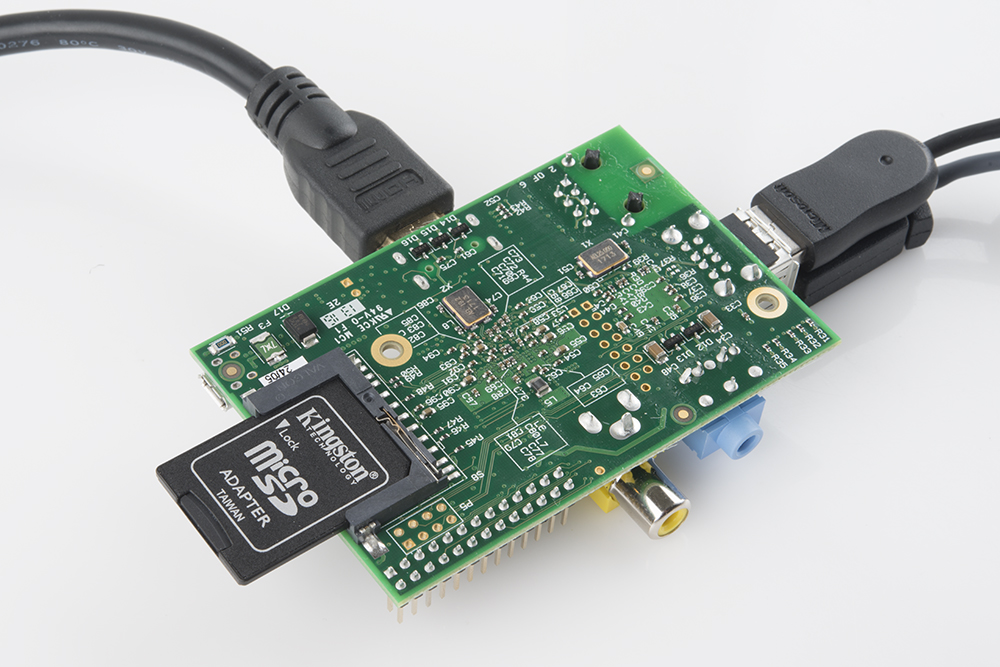
Insert SD Card
Insert your prepared SD card into the Pi. The SD socket is on the bottom side of the board. When inserting your card, make sure the gold contacts are facing up toward the board.
(Optional, Recommended) Connect Ethernet
In order to download updates and other software for your Pi, it’s recommended that you connect it to an Internet-connected network via Ethernet. The Ethernet jack sits right next to the pair of USB sockets.
Connect Power
Power time! Plug your micro-B USB cable into your wall adapter, then plug the other end into your Pi’s small, micro-B USB port.
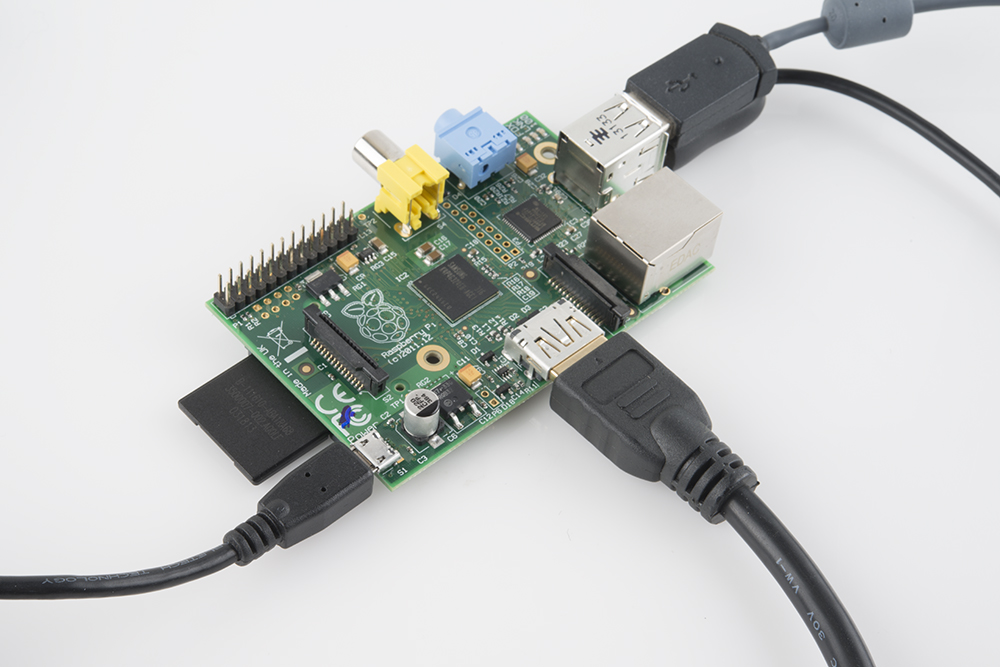
The Pi-quad-topus is complete. Time to power it up!
The Pi doesn’t have a power switch, so make sure everything else is plugged in before connecting power. As soon as power is applied to the Pi, it’ll look at the contents of the SD card and begin to boot up.
Quick! As the Pi begins to boot for the first time, head over to the next page for further directions.
Install Raspbian
As your Pi begins to boot for the first time, you should be presented with the image installation screen. If so, skip down to the Image Installation Selection section. Otherwise, time for some quick troubleshooting:
Blank, Black Display on First Boot?
If you’re turning on your Pi for the first time, and don’t see anything on the screen, don’t fret! As long as your monitor isn’t complaining about “No Signal”, the Pi probably is working.
First, try pressing either 1, 2, 3, or 4 on your keyboard depending on which display mode you need:
- HDMI – Regular HDMI mode.
- HDMI safe – Try this if you’re using HDMI, but option 1 doesn’t work.
- Composite PAL – Composite cable, PAL signal out.
- Composite NTSC – Composite cable, NTSC signal out.
After selecting the correct mode, your screen should continue on to the install selection screen.
Still No Luck?
If your screen is still blank, you may have to manually configure it. Try this:
- Unplug your Pi, take out the SD card, and plug it back into your computer.
- Create a new file called
config.txtat the top level of your SD card. - In
config.txtadd these lines:hdmi_drive=2 # HDMI/DVI mode (1=DVI, 2=HDMI) hdmi_group=2 # HDMI type (1=CEA, 2=DMT) hdmi_mode=16 # Resolution (9=800x600/60Hz, 16=1024x768/60, 28=1280x800/60) hdmi_force_hotplug=1 # 1=Force HDMI mode even if no HDMI montor is detected
You may need to alter some values there. These settings manually define things like HDMI mode and resolution. For more help altering the config.txt file, check out the RPiconfig page.
(These values were required for an old 15-inch monitor connected to the Pi via a VGA-to-HDMI adapter.)
Image Install Selection
The first step in NOOBS setup is selecting which images to install. We recommend selecting at least Raspbian. If you have a lot of space on your card, you can install multiple operating system images.
Use you mouse to select or de-select options (or navigate up and down with the arrow keys, and Spacebar to select).
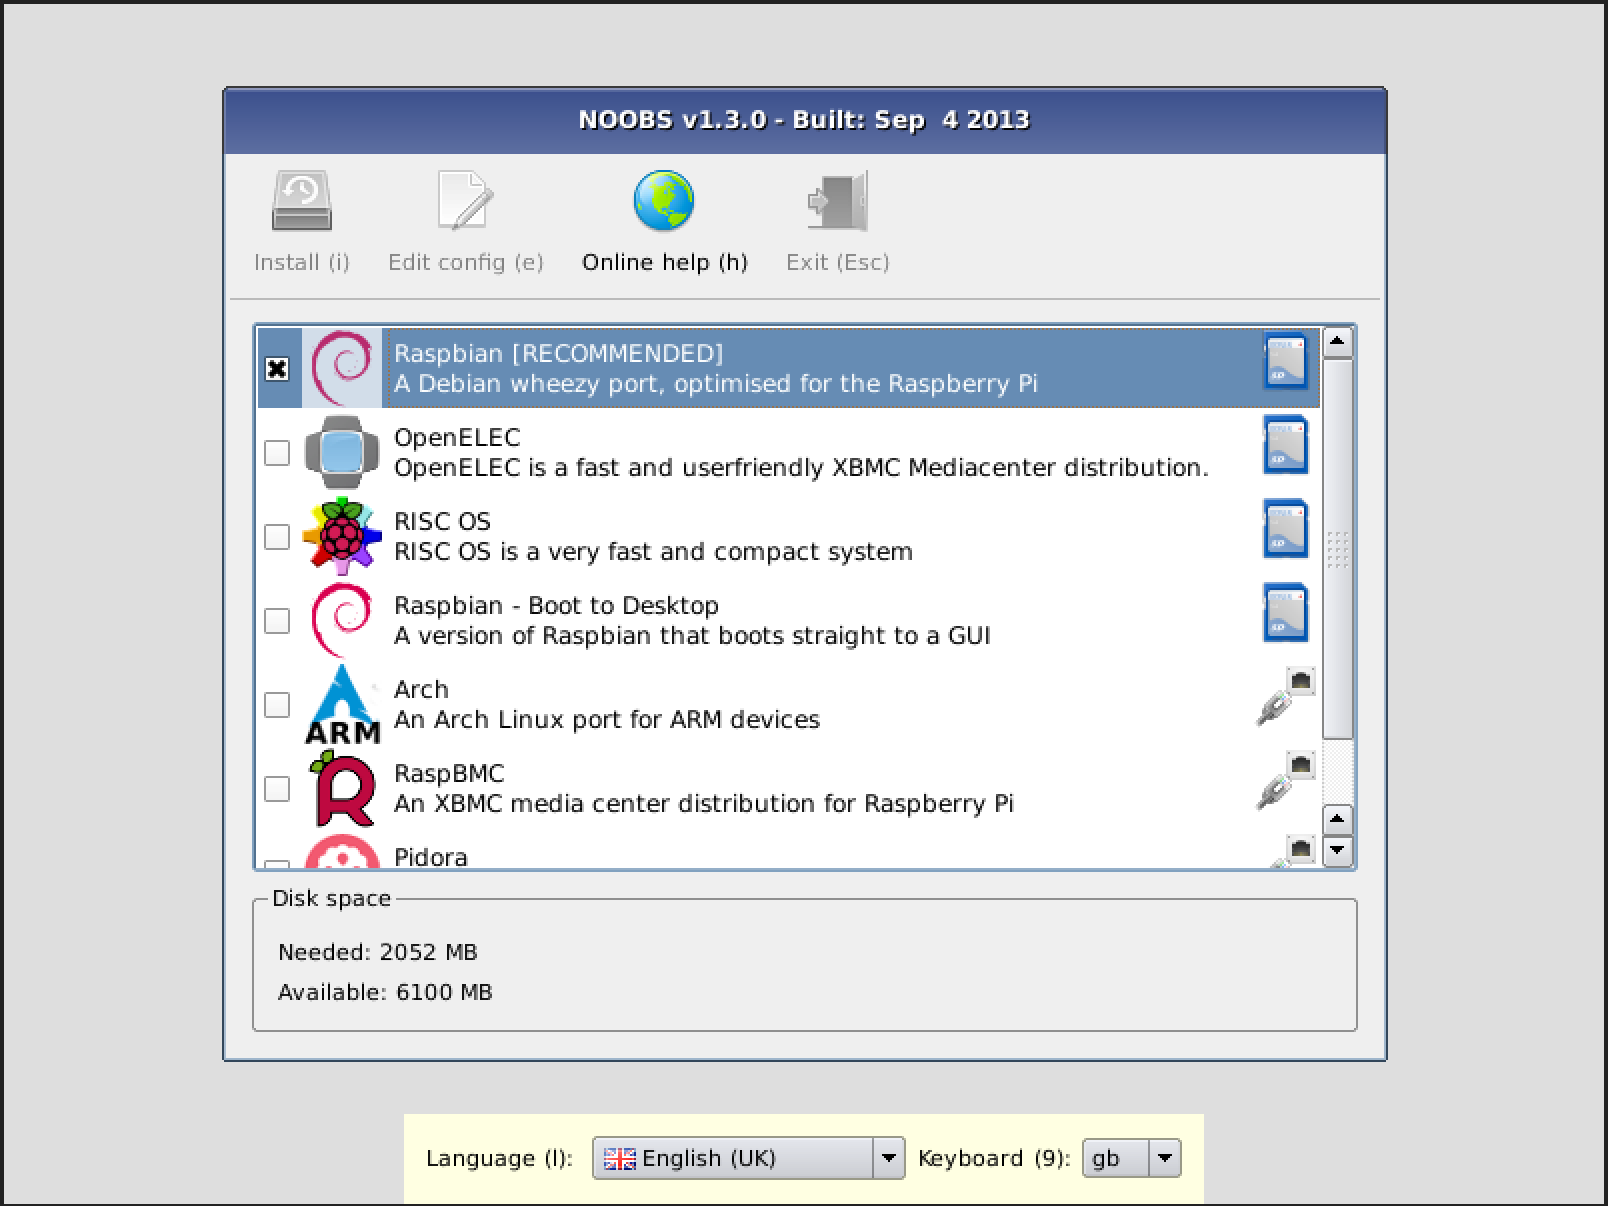
After selecting the image, you can modify the language setting. Then click install or press
i to start the installation.
The installation procedure will take a while (30 minutes to an hour-ish). Read the handful of installation slides:

Then go take a break to bake some pie or something.
Setup Raspbian
After NOOBS runs through the installation process the Raspberry Pi will reboot, and present you with the Raspberry Pi Software Configuration Tool (if you don’t see this, scroll down to the next section:

- Expand Filesystem – Don’t worry about this. NOOBS already did it for you.
- Change User Password – This step is recommended! Follow the on-screen directions to set a new password for you Pi. By default the password is set to raspberry, and the user is set to pi.
- Enable Boot to Desktop/Scratch – Select whether to boot into desktop or simply the text console. The console mode will obviously boot faster, and you can type
Startxto open the GUI. Booting to desktop may be easier for those more comfortable with Windows or Mac, though. - Internationalisation Options – Here you can adjust the timezone, keyboard layout, and language of your Pi. These changes take a while to be made, so be patient.
- Enable Camera – If you’ve got a Raspberry Pi Camera, this is the setting for you.
- Add to Rastrack – If you want your Pi to be documented on Rastrack.
- Overclock – If really want to ride your Pi to the max, you can overclock it. This taxes the entire system, and can lead to failures. Make sure you have a beefier power supply if you overclock. We recommend at least trying the Pi at normal clock settings, before deciding to overclock it.
- Advanced Options – There are some fun options here, like setting the hostname or enabling/disabling SPI and SSH. For the most part, these options can be left alone, though.
Once you’ve made all of your adjustments, scroll down and over to
<Finish> and allow the Pi to Reboot.
If you booted into console mode, type
Startx to open the GUI. Otherwise, you’ll already be presented with the beautiful Raspberry Pi desktop.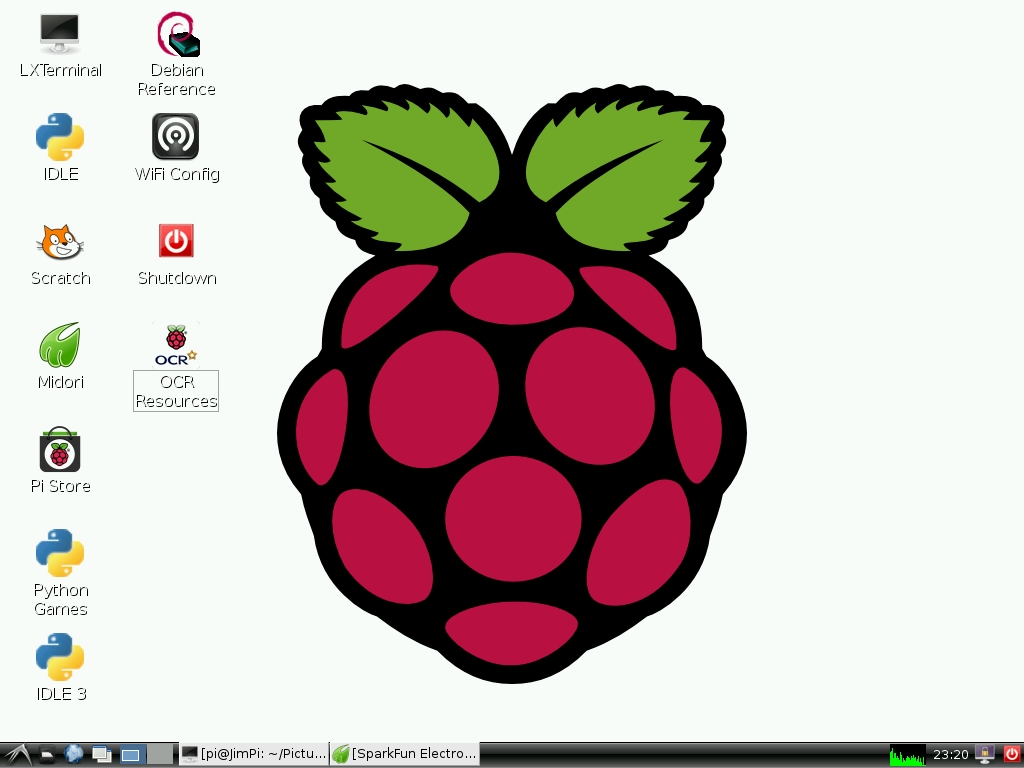
The default Raspbian desktop.
Booting to Blank, Black Screen?
If, after installing Raspbian, your Pi boots up only to land back on a blank, black screen, you may need to edit another
config.txt. This one specific to the Raspbian install.
The key to this is entering recovery mode. When the Pi is booting, you should at least see this screen:
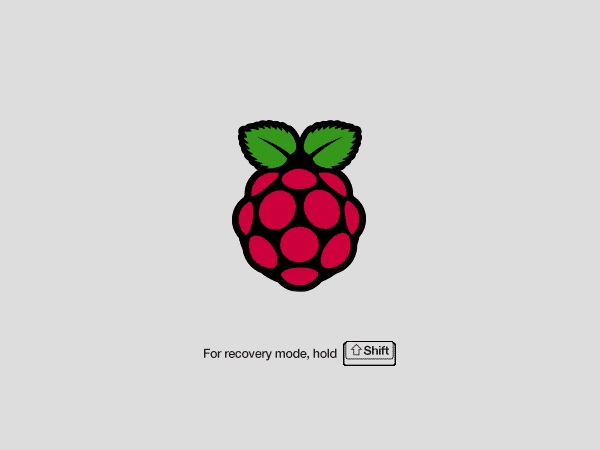
As soon as you see that grey, recovery mode screen hold down shift to enter recovery mode. This should present you with a familiar looking window. “Raspbian” should already be selected, and it should have a greenish background to indicate it’s installed. Select your Raspbian image, and then click Edit config (e) (or press
e) to openconfig.txt.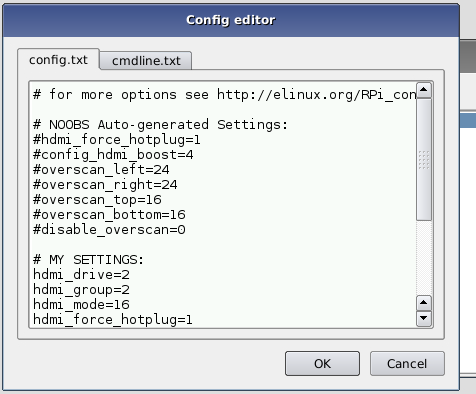
Each line that begins with a
# is commented out, so scroll down to the very bottom where there are a handful of non-comment lines. This is where you’ll want to modify the NOOBS Auto-generated Settings to match what you need. If you had to manually create a config.txt file in the last step, try using those same values. For example, this worked for us:hdmi_drive=2 # HDMI/DVI mode (1=DVI, 2=HDMI) hdmi_group=2 # HDMI type (1=CEA, 2=DMT) hdmi_mode=16 # Resolution (9=800x600/60Hz, 16=1024x768/60, 28=1280x800/60) hdmi_force_hotplug=1 # 1=Force HDMI mode even if no HDMI montor is detected
Check out the RPiconfig page for more help adjusting keys and values. Make sure you comment out (or replace) the keys and values that were already there.
Then hit ESC and cross your fingers as the Pi reboots. If you see a wall of scrolling text as the operating system begins to boot, that’s a good sign! If not, go back to recovery mode and try modifying
config.txt some other way.Exploring Raspbian
Raspbian comes with a variety of useful software tools. The UI should feel generally similar to Windows, OS X, and other Linux OS'es you may have used.
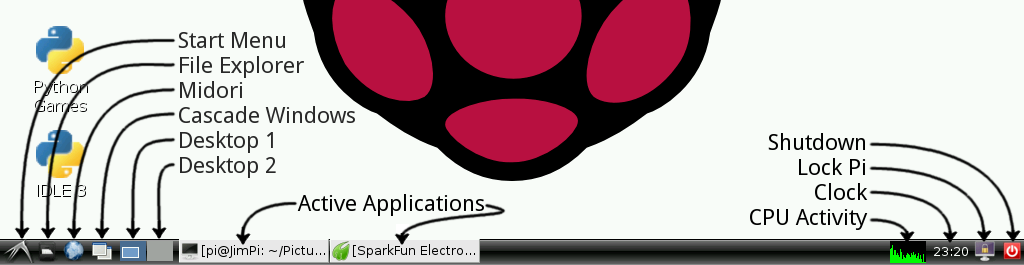
You can explore the environment on your own, but here are some of our favorite included tools:
File Manager
If you’ve done any sort of file manipulation, creation, or deletion, you’ve probably encountered a file browser before. Open the File Manager by clicking the second icon from the left on the bottom taskbar.
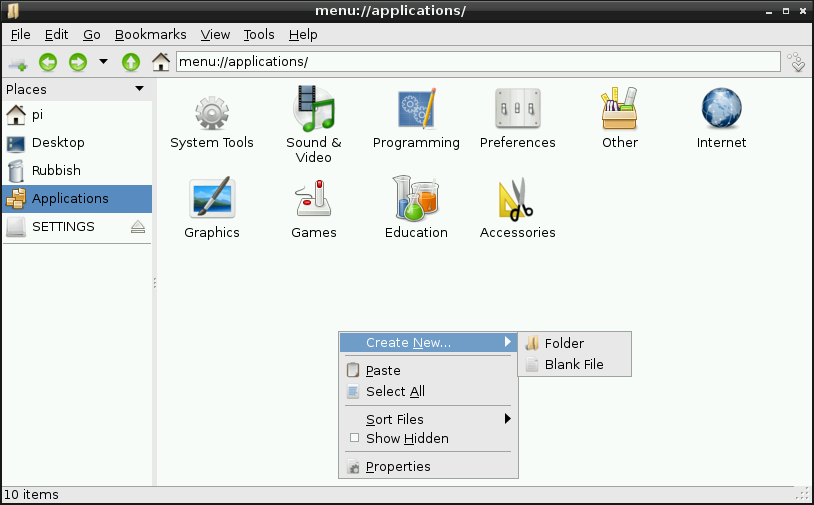
Using the file manager to browse around the Applications folder.
You can use the File Manager to look around at what files, applications, and tools are included with Raspbian. Or you can be a little more Linux-y by using the terminal…
LXTerminal
LXTerminal is Raspbian’s default terminal program. If thinking of “Linux” conjures images of hackers typing furiously into a text-filled black-and-white terminal, LXTerminal is the actualization of that.
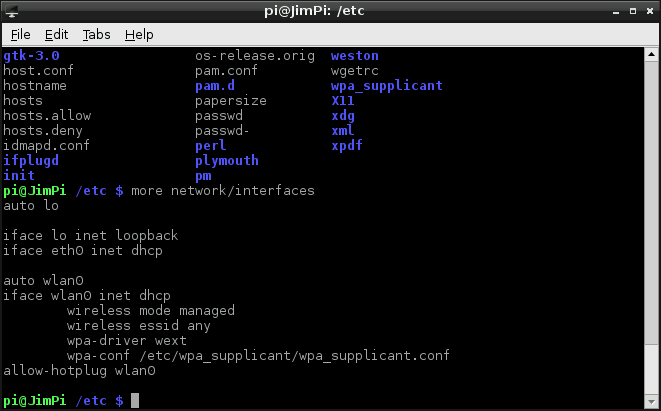
If you’ve never used Linux, or are unfamiliar with the command line interface (CLI), there are plenty of resources to help get you started. Begin with navigating around using
cd, list some directory contents with ls, read some command manuals with man, and you’ll be a command line ninja in no time.Midori
Midori is the default web browser bundled with Raspbian. Midori aims to be both fast and lightweight, but it can still handle a lot of modern web pages.
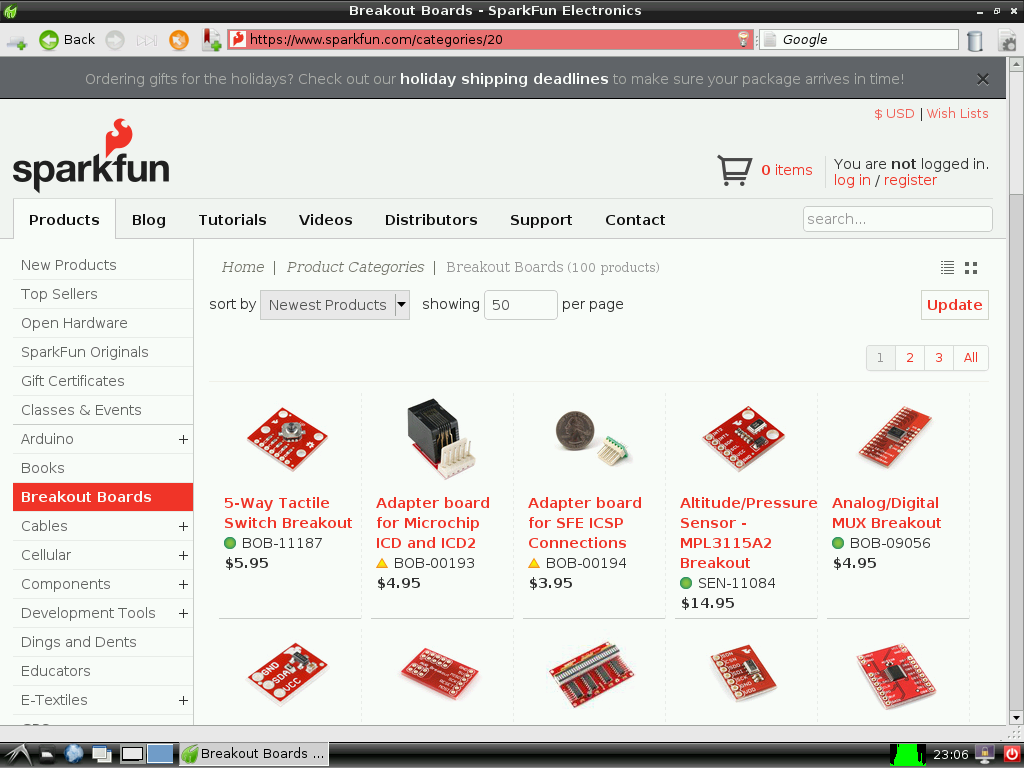
Browsing SFE from Midori.
With Midori you have access to tabs, bookmarks, search bars, and other utilities you may be accustomed to with using other web browsers. No Flash, though, so no Youtube'ing.
Text Editors: Nano & Leafpad
Both of these text editors can be used to modify text files, which is necssary to configure many applications. The difference between the two is the GUI. Leafpad is a few-frills, graphical text editor like Notepad (Windows) or TextEdit (OS X). Leafpad can be found from the “Accessories” menu under the Start menu.
Nano is Raspbian’s terminal-based text editor. It’s fast, lightweight, and more technical than Leafpad. Once you get into the habit of using Nano, you’ll never go back to Leafpad, because you can edit stuff so much faster.
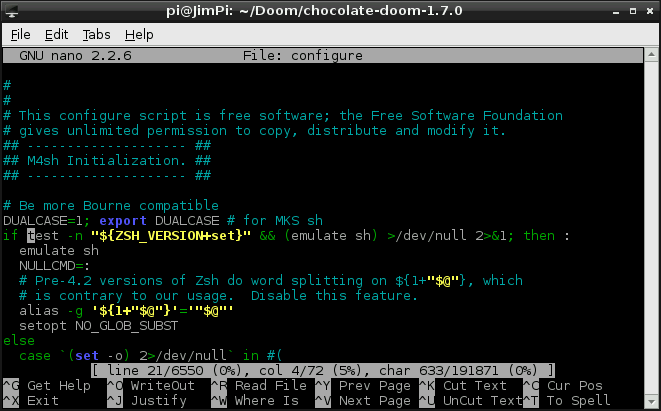
Editing a makefile config file with Nano.
Nano is perfect for editing short configuration files, especially those you need superuser privileges for. To open a file for editing with nano, use the terminal command
nano filename.abc. Or, to open it with root privileges, usesudo nano filename.abc.
If you really want to take your terminal text editing a step further, Raspbian does include Vi (or you can download and install Emacs [not trying to start a turf war here]).
Python
Raspbian also includes Python (both version 2.7.3 and 3.2.3), a scripting language of which we’re quite enamored with. Python is an amazingly powerful programming language, thanks to all of the amazing libraries that have already been written with it and its cross-platform-ability.
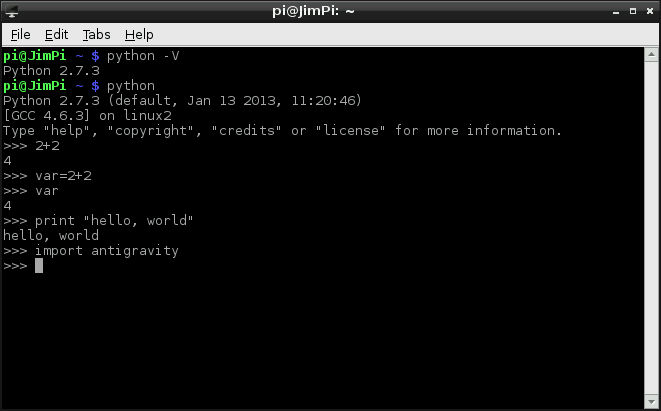
Doing math and defying gravity with Python!
Python is useful for simple hardware control (toggling I/O pins, interfacing with I2C sensors, etc.), and it can even be used to create fully-functional projects, like our Twitter Monitor.
If you want to begin learningi Python, there are plenty of resources to help you get started. Codeacademy is pretty great, as is the Python Documentation itself.
DOOOOOOOM!
Once you’ve familiarized yourself with everything Raspbian includes, you may notice it’s missing something. Certainly you’ve got the web, you’ve got Python, you even have Python games. But there aren’t any Python games that have you playing a space marine fighting off an otherworldly invasion on Mars. Let’s install Doom.
This step does require a connection to the Internet. So you’ll either need to route Ethernet to your Pi, or set up WiFi. If you’re a Linux newbie, this is a great opportunity to have your first experience with apt-get, tarball extraction, binary compilation, and installation – stuff you’ll be doing a lot of as you continue on.
There will be a lot of command line interaction here, so open up LXTerminal now. Every terminal command you should send will be presented as such:
pi@raspberrypi ~ $ man apt-get
Which emulates the default look of your terminal. Only send the grey-ish text in that line. The text in green represents your user and localhost name (which may be different). The text in blue represents your current directory (
~ is the /home/pi directory).Install Dependencies
Before we can compile Chocolate Doom, there are a few dependencies we need to harness first.
To begin, it’s always a good idea to update your apt-get index with:
pi@raspberrypi ~ $ sudo apt-get update
After
apt-get update runs, we can apt-get all of our dependencies with this beast of a command:
pi@raspberrypi ~ $ sudo apt-get install libsdl1.2debian libsdl-image1.2 libsdl-mixer1.2 libsdl-mixer1.2-dev libsdl-net1.2 libsdl-net1.2-dev timidity.
It’ll alert you that the total “get” will be about 90MB. Type
Y to begin the download. Now, time for something you’ll be doing a lot of: waiting. The downloading and unpacking will take 20-or-so minutes to finish up. While you’re waiting you can read up on the dependencies you’re installing:- libsdl1.2debian – Simple DirectMedia Layer (SDL)
- libsdl-image1.2 – Image loading for SDL
- libsdl-mixer1.2 – Audio mixer library for SDL
- libsdl-mixer1.2-dev – Audio mixer library development files
- libsdl-net1.2 – Network library for SDL
- libsdl-net1.2-dev – Network library development files
- timidity – MIDI, MOD and other sound file renderer
It’s always good to know a little something about what you’re downloading and installing.
Download and Unpack the Source
Now that we have the dependencies under control, we can download the Chocolate Doom source code. First,navigate to a directory where you want the files to live. Here are commands to create a directory called “Doom” and go there:
pi@raspberrypi ~ $ mkdir Doom
pi@raspberrypi ~ $ cd Doom
pi@raspberrypi ~ $ cd Doom
Next, download Chocolate Doom with the
wget command by sending:
pi@raspberrypi ~/Doom $ sudo wget http://www.chocolate-doom.org/downloads/2.0.0/chocolate-doom-2.0.0.tar.gz
(The version number may update, which may make that link 404. If you get an error, check for a new version on Chocolate Doom’s homepage.)
Extract the tar.gz file by with this
tar command:
pi@raspberrypi ~/Doom $ tar -xvf chocolate-doom-2.0.0.tar.gz
Then move into the
chocolate-doom-2.0.0 directory by sending:
pi@raspberrypi ~/Doom $ cd chocolate-doom-2.0.0
Configure, Make and Install
To double-check that everything looks correct, you can use the
ls command to view all files in your current directory.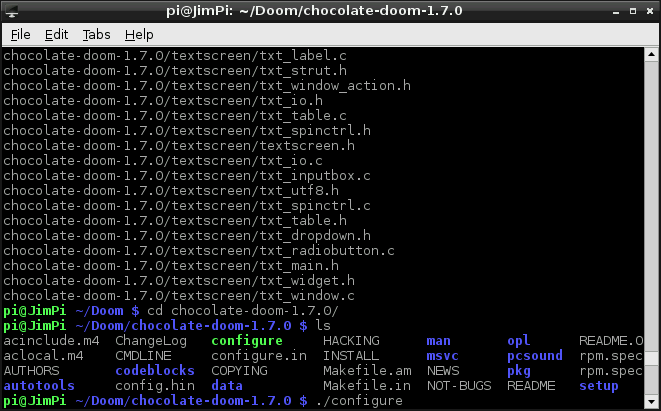
After un-tarring comes the ./configure command.
The next step is to configure Chocolate Doom by running the
configure file. Do this with:
pi@raspberrypi ~/Doom/chocolate-doom-2.0.0 $ ./configure
Getting close! The next step is to
make Chocolate Doom:
pi@raspberrypi ~/Doom/chocolate-doom-2.0.0 $ make
Watch the compilation scroll through a huge list of processes. Time for more thumb-twiddling. Once that’s done, the last step is to:
pi@raspberrypi ~/Doom/chocolate-doom-2.0.0 $ sudo make install
Woo! The Chocolate Doom engine is installed!
Download a WAD
You’ve got the game installed, but where’s all the data? WAD’s where all the data is. In order to run Chocolate Doom requires that you point it to a WAD file on your Pi.
There are a variety of WAD files out there. If you don’t own the game, you can download a shareware WAD here. Or if you want to stick to the command line, type this:
pi@raspberrypi ~/Doom/chocolate-doom-2.0.0 $ cd ..
pi@raspberrypi ~/Doom $ sudo wget http://www.jbserver.com/downloads/games/doom/misc/shareware/doom1.wad.zip
pi@raspberrypi ~/Doom $ sudo wget http://www.jbserver.com/downloads/games/doom/misc/shareware/doom1.wad.zip
And then unzip the WAD with this command:
pi@raspberrypi ~/Doom/chocolate-doom-2.0.0 $ sudo unzip doom1.wad.zip
Now you should have a file named
DOOM1.WAD in your Doom folder.Setup and Play!
To open the Chocolate Doom setup utility, use the
chocolate-doom-setup command. While you’re doing so, you should also point it to the Doom WAD file you downloaded:
pi@raspberrypi ~/Doom $ chocolate-setup -iwad DOOM1.WAD
With the Chocolate Doom Setup utility you can adjust things like screen resolution (full-screen or windowed), configure keyboard, mouse, and joystick inputs, and sound.

Once you’ve made all of those changes, click “Save Parameters and Launch DOOM”.
If you ever want to launch straight into Doom, you can use this command:
pi@raspberrypi ~/Doom $ chocolate-doom -iwad DOOM1.WAD
Now go save the world!
Resources & Going Further
There are loads of resources around the web to help answer your Raspberry Pi-related cravings. Including:
- Raspberry Pi Resources:
- eLinux Raspberry Pi Hub – An excellent wiki resource for all things Pi.
- eLinux Troubleshooting Guide
- Raspbian Documentation
- Raspbian FAQ
- Raspbian Forums
- wiringPi – An Arduino-like programming interface for the Raspberry Pi.
- General Linux Resources:
- Basic Linux Commands – Great resource for Linux newbies.
- ExplainShell.com – Really cool tool that dissects terminal commands. Great if you’ve ever wondered what, exactly, those seemingly aimless command lines do.
- Etc.
No comments:
Post a Comment